
Sections in this Tutorial:
setup widgets your first page rows
Depending on your skill level as a web developer you may or may not choose to use PageBuilder by SiteOrigin. We recognize that not everyone has the ability to write code. And that's just fine. Our hope is that by using a tool like PageBuilder, you'll be able to be more creative with your website without the need to custom code every piece of it.
Why Page Builder by SiteOrigin?
We spent about a year exploring different page builder tools to use within our WordPress environment. We considered all options, including building one ourselves. In the end our research led us to Page Builder by SiteOrigin. Ultimately Page Builder blends a robust feature set with an easy to use front-end user experience. It also gives you the option to revert your page back to the classic editor and still maintain the layout without Page Builder. These are some of the reasons we've opted for the page builder over others you may have heard about.
Setting Up Page Builder by SiteOrigin:
Page Builder by SiteOrigin is a plugin that we have vetted and approved for use within our WordPress theme. To have access to use it you will need to ensure it is installed and activated on your website. To do this follow these steps:
- Login to your website.
- From the WordPress dashboard, select "Plugins" > "Installed Plugins" from the wordpress menu bar on the left side of your browser.
- Find the following plugins in the plugins list:
- "Page Builder by SiteOrigin"
- "SiteOrigin Widgets Bundle"
- (and optionally) "SiteOrigin Premium"
- Click "activate" under each of those items
That's it. Your plugins are activated and ready to use. Next we'll take a look at some of the widgets that come built-in with the Page Builder tool.
Activating SiteOrigin Widgets
Once the plugins are activated there's one step left before we can start building pages using Page Builder.
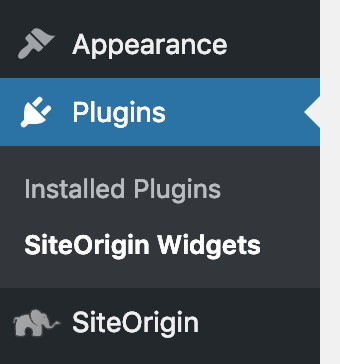
You should now see a new option called "SiteOrigin Widgets" under the "Plugins" menu in the wordpress menu on the left. If you have installed SiteOrigin Premium you will see it listed as its own new menu item.
Select "Siteorigin Widgets"
You can now select the widgets you would like to have access to within the Page Builder tool. You will need to do this for both the standard widgets as well as the Premium Widgets if you're using those.
Within each widget page you will see the available widgets and a short description of what each does. Click the "activate" button under each item you would like to have available as you build out your site. You can always come back and activate or deactivate widgets as needed.
You will notice several widgets are already activated by default. Feel free to use as many or as few as you like. Some of the widgets we find ourselves reaching for most are:
- Editor
- Button
- Image
- Hero
- Layout Slider
We've also included Utah custom built widgets that are compatible with SiteOrigin. If you don't use those ones you'll hurt our feelings. 😉
SiteOrigin Standard Widgets

SiteOrigin Premium Widgets

Activating SiteOrigin on Your Page or Post:
With the plugin active and the plugin widgets selected and activated we are ready to start using Page Builder on pages and posts. This will allow you enormous layout flexibility for more complex content and interesting designs.
When you create a new page you should see a new tab option called "Page Builder" on the top right of the WSIWYG editor.
Select this option to use Page Builder as the default editor for this page or post.

Once you've selected this option the default editor will change to the Page Builder editor and look like this:
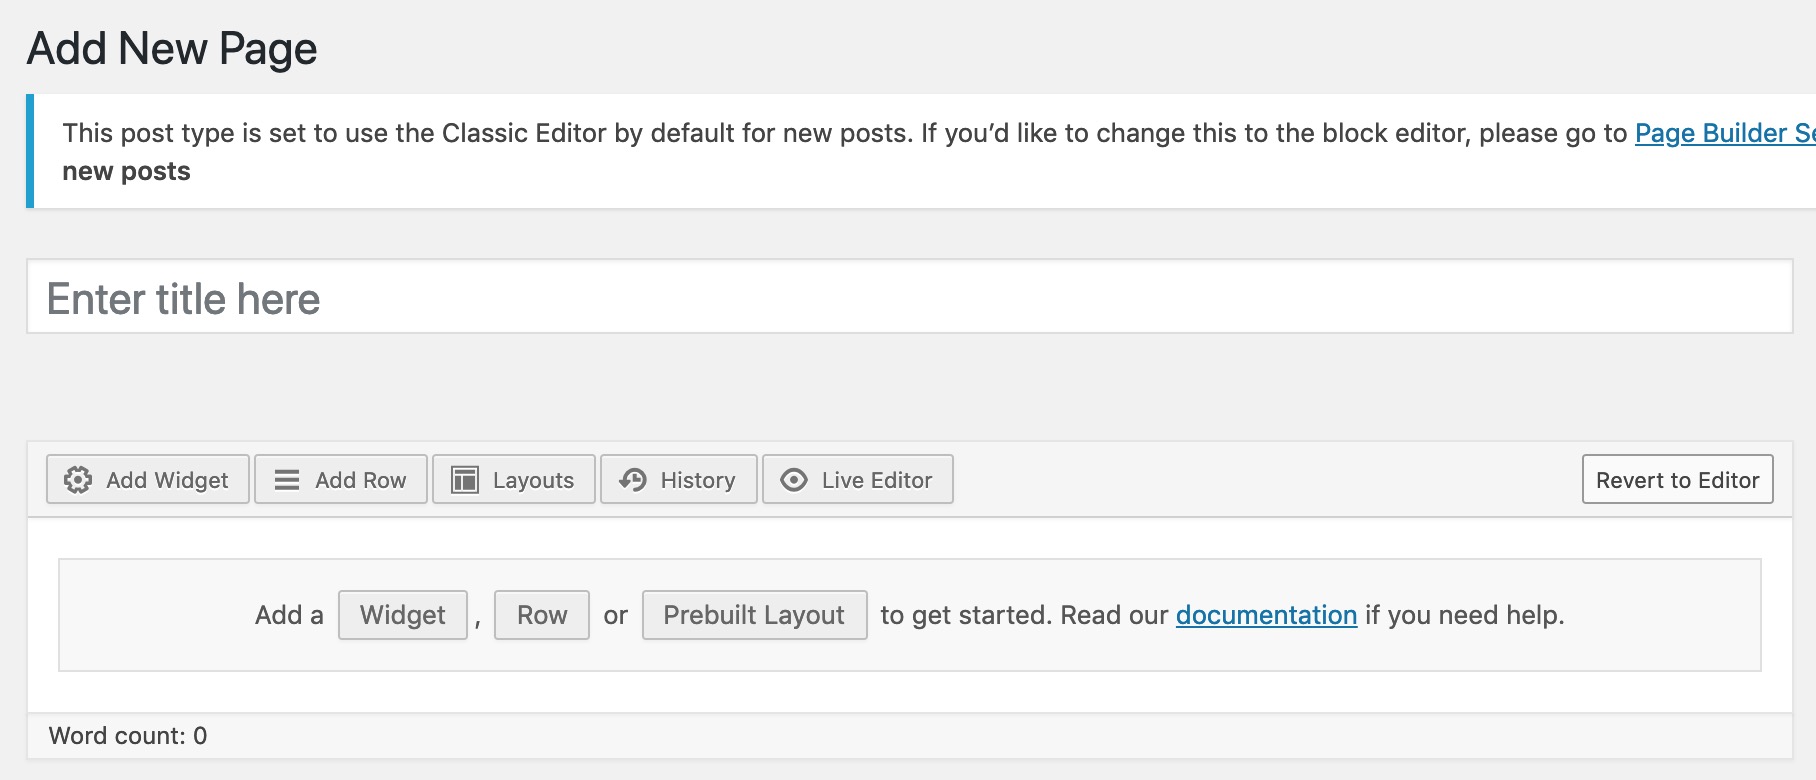
Now instead of simply being able to type and use a basic editor you can utilize widgets, rows, layouts, and even work in a live preview mode as you build your page.
Next we'll get started using Page Builder by adding a row and a simple widget.
Getting Started with Rows & Widgets
The basic building blocks of Page Builder are rows and widgets. Rows are basically containers for widgets. You can chop a row up into a bunch of different columns and fill each column with widgets.
You can also nest rows within rows using the Layout Builder widget, but that's a whole tutorial in itself.
To add a row: click on the "Add Row" option above the editor, or click on "Row" from the editor "Add a" section.
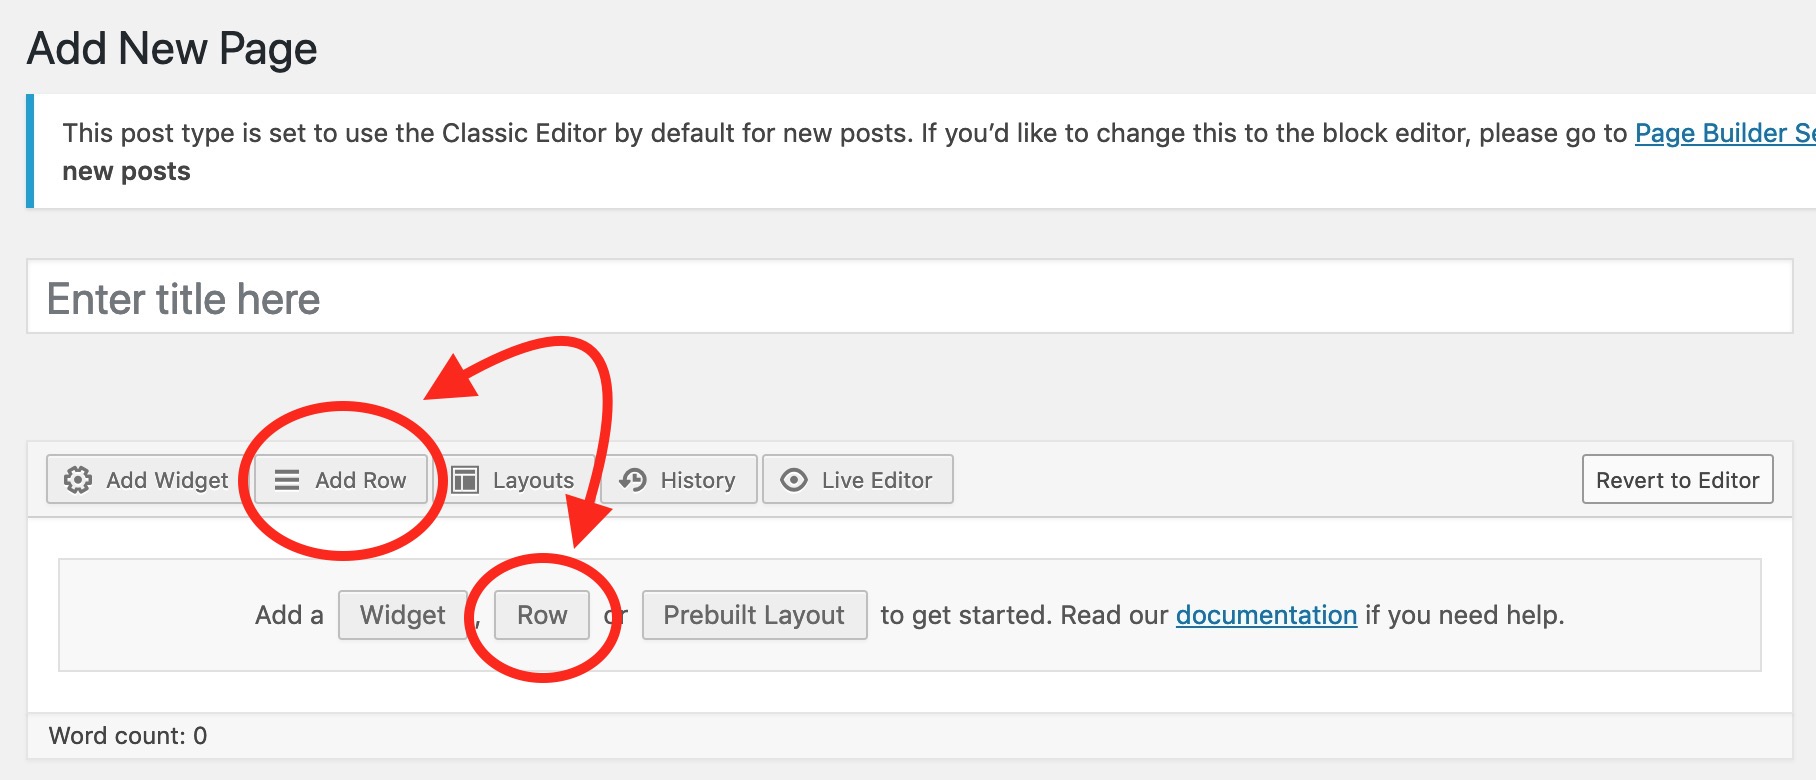
This will open the Row options window, and by default will setup a two column row. You can change MANY features of this row within this window. If you're happy with this two column standard row you can select insert and your new row will be ready for widgets.


You can see the newly created two-column row ready to be filled with content. To add widgets to these row columns you can select "add widget" from the area above the editor, or right click in the column row you would like to fill and select or search for the widget you would like to use. If a widget is in a column you didn't intend, you can simply drag it to where you would like it to be.
Let's add an "image widget" on the left and a content "editor widget" on the right.

By clicking into each widget you'll be able to add your content and start filling up your page.
That's a real quick overview of how to use Rows and Widgets in Page Builder. We will be adding more tutorials on Page Builder in the future to take your skills to the next level.